DIY Pallet Coffee Table

July 28, 2015

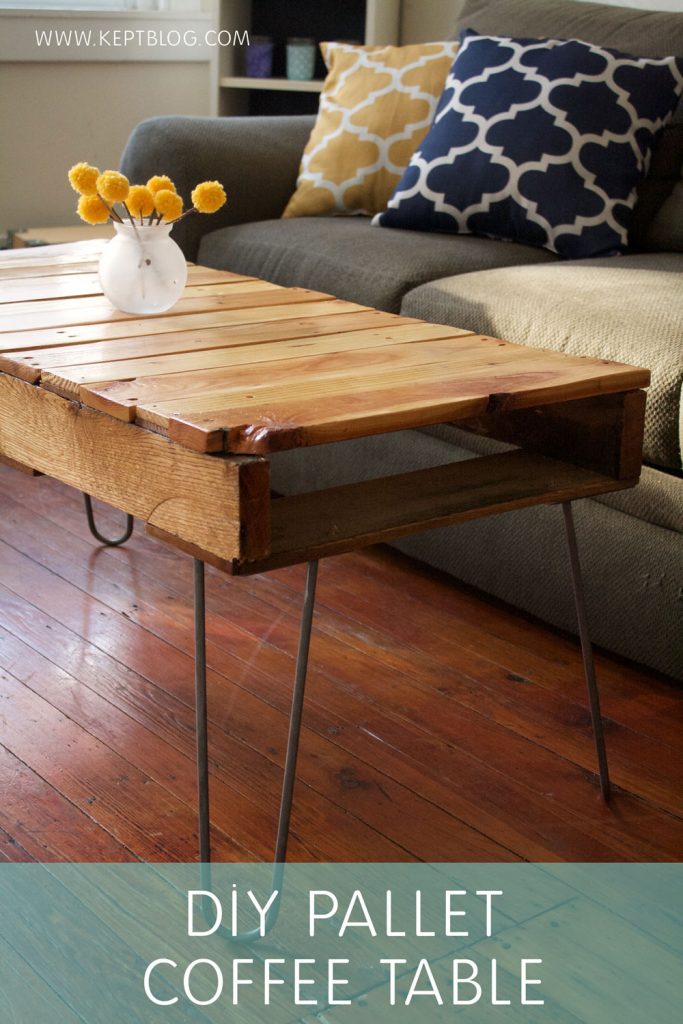
I love DIY projects that involve turning something deemed unusable into something gorgeous and functional. This pallet coffee table has to be my favorite transformation to date.

I have been wanting a new coffee table for quite some time, but wasn’t about to pay $100+ for one from a big name store. Making this pallet coffee table myself gave my living room the rustic and industrial feel that I love, without the hefty price tag.

This project doesn’t require power tools but the process is so much easier and quicker if you can get your hands on a circular saw and an orbital sander. If you don’t have these tools, I suggest borrowing from a friend or renting the tools from Lowe’s or Home Depot. The price to rent from one of these places depends on how long you need it, and in the range of $15-$20 per 4 hours and $20-$25 per day. Circular saws are no joke so, as a general rule, if you’e never used one before, get someone to help you learn how to use it or have them make the cuts for you. Or just use a hand saw – the cuts you’ll be making (if any) are fairly simple.

As you can see from the picture above, my secondary slats are thinner than my main slats. Because of this, I inserted small pieces of wood (I actually used leftover laminate flooring) in between the secondary slats and the main pallet so the table surface is level. But every pallet is different, so feel free to get creative with yours.
Total Cost: $50-$60
Materials:

1-2 Pallets
Sandpaper or orbital sander (80, 120, and 220+ grit)
Hand saw, circular saw, reciprocating saw, or table saw
20 – 1 3/4-inch trim nails
8 – #12×1/2-inch sheet metal or wood screws
Clear gloss polyurethane
Hairpin Legs

Step 1: Find a pallet (or two)
Pallets are fairly easy to find. I went on a pallet-finding mission and drove around North Philly, looking for the best of the best. I picked up several pallets, mostly from the side of the road, in the trash, and near loading docks. Some of the pallets I found were in decent condition and some were just ok. So, I just took what I could get with the idea that I’d combine two pallets to make one seamless piece. I also found a couple pallets behind a Walmart but I do not suggest taking them without permission…it may be illegal.
If you can find a pallet with little to no gaps in between the slats, that would be ideal. Pallets with the slats close together means you don’t have to take pieces from another pallet to fill in the gaps, which reduces the amount of cutting you’ll have to do.
Step 2: Cut the main pallet

I chose to cut my pallet in half because my living room would only allow for so much space. But, you can eliminate the cutting all together if you use a whole pallet.
Use whatever saw you have to make a cut just to the right or left of the center 2×4 support beam. You want your table to have solid support beams on either side, so you’ll have something to attach the legs to.
Step 3: Disassemble the secondary pallet

If you are unable to find a pallet with slats close together, you’ll need a secondary pallet to fill in the gaps. You can disassemble a pallet by prying the boards off with a crow bar or hammer, but when I tried this, the wood started to split.
An easier and quicker way is to use a reciprocating saw (sawzall) to cut the pieces off, through the nail and all. You’ll need a metal-cutting blade to cut through the nails from top to bottom, in between each front slat and 2×4 support beam. This video thoroughly explains how to disassemble a pallet.
Step 4: Cut the secondary slats down to size

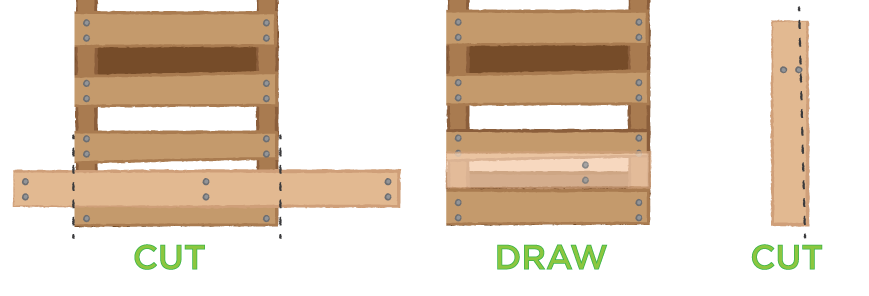
This is the trickiest step. Most pallets have varying widths in between each slat so, to have a seamless result, I had to cut each of my secondary slats so that each piece would fit snuggly in between the main slats. You can use a measuring tape but I prefer just lining up the pieces, drawing a line, and then making the cut.
First, cut the secondary slats to length. With the pallet laying flat, lay a secondary slat next to a main slat. With a pencil, draw a line perpendicular to the slat. Make sure you’re drawing the line in a place where you won’t run into nails. Then, using a saw, make the cuts.
Second, cut the secondary slats to width. Line up your secondary slats with the main slats as best you can. On each end of the secondary slat, draw a mark (*) where the secondary slat and main slat overlap. Draw a lengthwise line connecting the two marks. Then, use a saw (I think a circular saw works best here) to cut along that line. Watch to make sure you’re not cutting through any nails. The result should be a piece that fits almost perfectly in between those slats.
Since the space between each slat will be different, the size of each secondary piece will be different. It’s helpful to mark (I numbered mine) the position of each slat on the back so you can easily match them up later.
Step 5: Sand the heck out of your pallet and pallet pieces

Starting with the 80 grit, use an orbital sander or sandpaper to sand the rough spots on the pallet and each secondary piece. Then follow up with 120 grit sandpaper to get each piece feeling smooth. I sanded only the parts of the table that would be easily visible (the top and the sides).
Step 6: Nail down the secondary slats

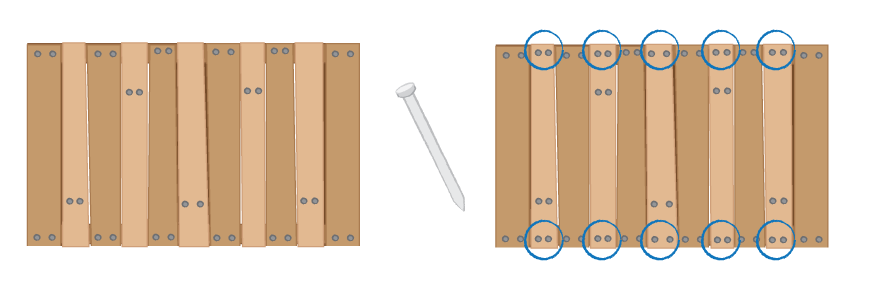
Lay down each secondary slat in its correct position. Then, carefully nail each board to the main pallet, putting two nails on each end of the slats. Start out gentle to make sure you’re not going to split the wood. If the wood begins to split, stop and drill small pilot holes for each nail. Pilot holes are just small holes that make it easier to insert the nail. The whole should not be bigger than the nail itself.
Step 7: Apply the polyurethane

In a well-ventilated area, lay down a drop cloth or some newspapers to catch any drips. Apply one coat of polyurethane, carefully following the directions on the label. Let dry for the recommended drying time – probably about 3-4 hours.
Once thoroughly dry, use 220 grit (or higher) sandpaper to lightly sand the wood. This helps the next coat of polyurethane hold better. Apply a second coat of polyurethane and let dry.
After the second coat has dried, sand and polyurethane one more time. This time let the table dry for 48 hours.
Step 8: Attach the legs

Hairpin legs were the majority of the cost for this project and can be found on eBay. The price varies, but can range from $45 to $100.
Use #12×1/2-inch screws to attach the legs to the table. The size of the screw may vary depending on how the legs were made. Choose one that fits your legs best.
Then, sit back with your coffee and enjoy!
*This post originally appeared on my former blog, Kept. While that blog has since retired, all the content transferred is up-to-date and my own.

