DIY Tree Branch Coat Rack

December 8, 2015
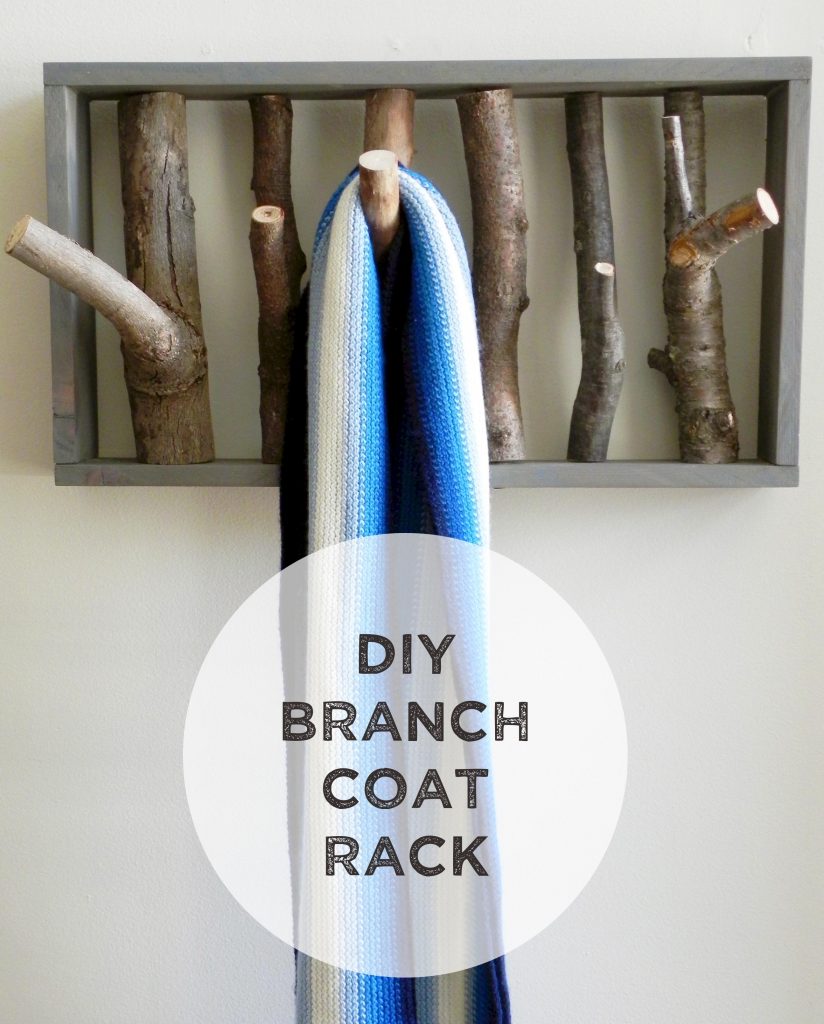
With the passing of Thanksgiving it’s finally time to transition from fall to winter. It’s a sad reality for someone like me, who lives for warm summer days, but I will say, winter has its perks too: plenty of snowboarding to be done and many excuses to stay inside and craft all day. This chilly transition also means it’s time to get out those winter coats. I usually keep mine in plastic tubs all year until the temps start to dip – then I begrudgingly pull each coat out as I dream of warmer weather.
My house is without a coat or storage closet so I’m left to hang my coats and scarves on hooks on the back of a door, which makes it difficult to open that door completely and is just plain ugly. I’m on a mission to get creative with my storage/organization solutions, so this year I finally decided to make myself a coat rack.

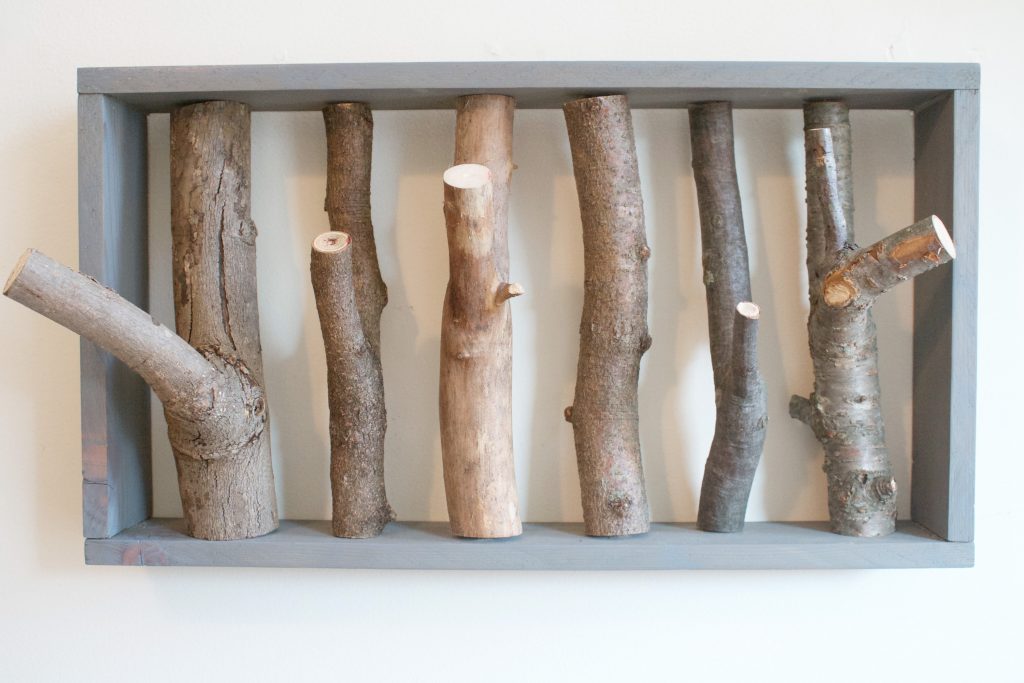
I literally paid nothing for this coat rack. Everything was either found in nature or left over from past projects, just waiting for its time to shine. I found some of the branches on a hike through the woods and also gathered some from the backyard of a generous friend. The frame I constructed out of cedar board left over from a different project.
You can use pretty much any wood to make your frame – 2x4s, scrap wood, pallet wood – as long as you can get two longer boards of the same length and two shorter boards of the same length out of it, then it’ll work. I decided to stain mine because I had stain left over from some string art projects and wanted to use it up but it’s certainly not necessary.
Materials
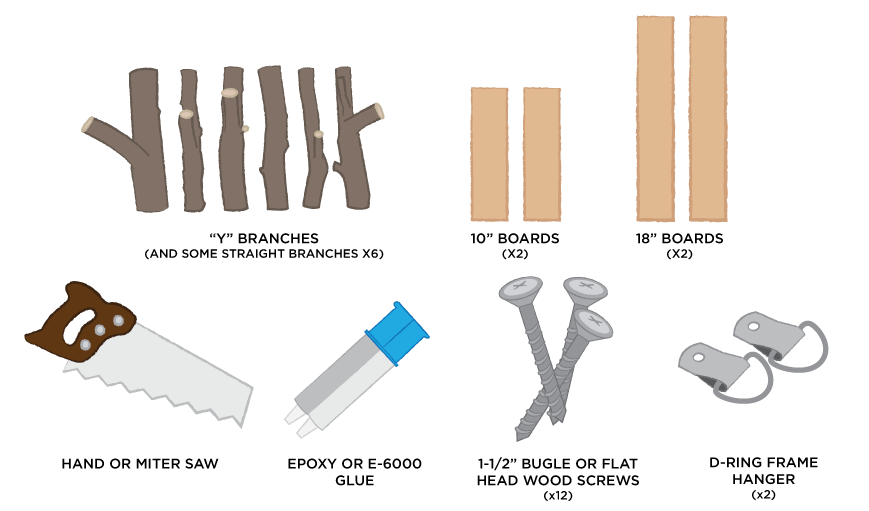
6 “y” branches – at least 1-inch thick
2 – 10-inch 2x4s (or other wood board)
2 – 18-inch 2x4s (or other wood board)
Strong adhesive (Epoxy for wood or E-6000)
Hand saw or miter saw
12 – 1-1/2-inch bugle or flat head wood screws
2 D-ring frame hangers
Step 1: Gather your branches
Get out and go exploring! This is the fun part. Take a walk through the woods (or your backyard?) and look for fallen “y” branches. You’ll need some sturdy hooks so make sure the branches are at least an inch thick. Also make sure they are long enough to be cut down to the size you choose.
The number of branches you collect depends on how many hooks you want your coat rack to have. It’s also good to gather regular branches (also at least an inch thick) to use in between the hook branches, to fill up space. For this project, I used 5 “y” branches and 1 regular branch.
Step 2: Create your frame
Decide what kind of wood you’re going to use and cut each piece to length (and width, if needed). If you don’t have any tools to cut the boards, go to Home Depot or Lowes and they will cut them for you for a very small fee (sometimes they do it for free).
A good height for your frame is 7-10 inches, but the width of your frame is completely up to you. If you’ve got a lot of coats to hang, maybe make your frame longer. I cut my cedar board into two 18-inch boards and two 10-inch boards.
Although not necessary, if you want to finish your wood in any way, now is the time to do it. Before you assemble the frame, sand, stain, or finish the boards and let dry completely (overnight is suggested).
Once completely dry, use a strong adhesive (like epoxy for wood or E-6000) to bond the boards at the corners. Assemble the frame so that the shorter (side) boards are “inside” the top and bottom boards, almost like a sandwich. If you have clamps, clamp each side of the frame and let dry according to the time indicated on the adhesive instructions (I usually let mine sit for at least an hour or two).
Step 3: Cut the heck out of your branches
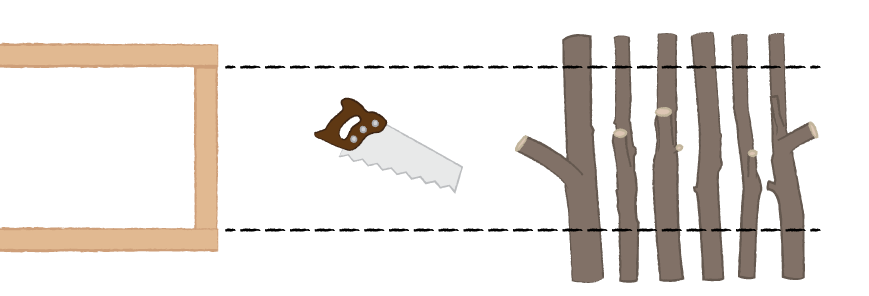
While your glue is drying, cut your branches to length. Using a miter or hand saw, cut each branch to the length of the side boards of your frame. In my case, I cut each branch to 10 inches. Cut each branch so that the “y”/hook is somewhat centered between the two ends.
This is the tricky part. Make sure to cut the branches so that the ends are parallel to each other. When you stand the branch up on a flat surface, it should be able to stand up on its own (although some branches can be particularly curvy, and may topple over, but that’s ok). You want the branch ends to be perpendicular to the top and bottom of the frame.
Step 4: Attach the branches to the frame
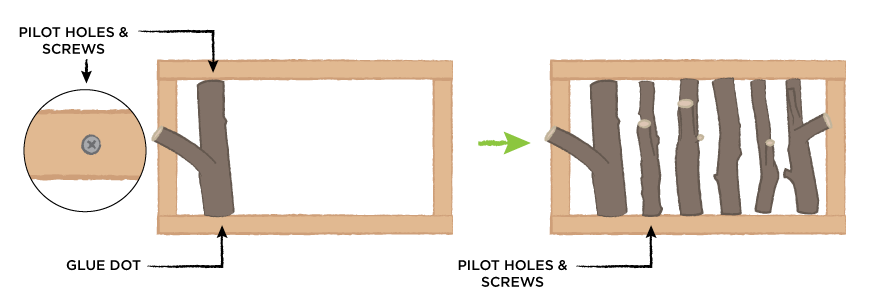
Now it’s time to assemble. Before you go crazy with the drill, stand your frame up on a flat surface and put the branches into the frame. Use this time to make sure the branches are in the order you want and are spaced the way you want them.
Once you have a layout decided, place a small dot of glue on the bottom end of each branch and put them back into place in the frame. This helps the branches stay in place when you’re drilling our holes and inserting our screws. Let the glue dry for a little bit.
Using a drill bit that’s slightly smaller than your screws, drill pilot holes through the top of the frame, into the center of each branch. It might be easier to mark where your pilot holes will be, with a pencil, before you start drilling. Then, insert a screw into each pilot hole, securing the tops of the branches to the top of the frame.
Once you have the tops of the branches screwed in place, flip the frame over and do the same thing to the bottoms of the branches. First drill pilot holes in the middle of each branch, then insert the screws.
Step 5: Hang your coat rack
Attach one D-ring frame hanger to each side of the frame, about and inch from the top, using small nails or screws. Don’t have D-ring hangers? Try using soda can tabs. Bend each tab at the middle just slightly, then attach to the frame using a screw with a head that’s bigger than the bottom hole of the tab.
Hang in desired location using screws.
*This post originally appeared on my former blog, Kept. While that blog has since retired, all the content transferred is up-to-date and my own.


