DIY Driftwood Lamp

October 6, 2015
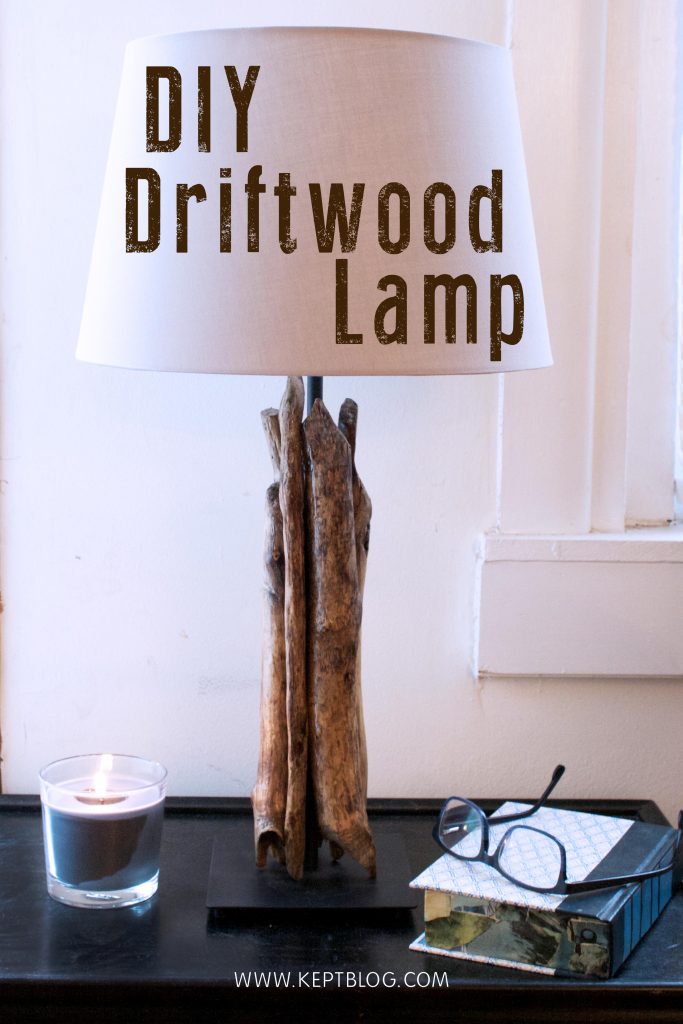
If you have a free afternoon and a few pieces of driftwood that you don’t know what to do with (doesn’t everyone have a laundry basket full of them in their basement?), then this project is for you. I have so much driftwood and this lamp was a great way to feature some of my favorite pieces in a unique way. I love the way this lamp turned out – it adds a bit texture to my living space and also complements my pallet coffee table.

Don’t be intimidated by this project. It is much easier than it looks to be and allows for a lot of your own creativity. There’s no pattern or diagram for this lamp – it’s all about positioning the pieces around an existing lamp rod in a way that looks good to you and is best for your space.
Note: Before I started this project I soaked my driftwood in a mixture of bleach and water for a few days and then laid them out to dry for a few days. While this does clean the wood and get rid of any living organisms that may have still been living in the wood, I don’t find this step absolutely necessary; at least not for the wood that I have. My driftwood is pretty clean as is and I found that this cleaning process took some of the natural color out of the wood and left it feeling a bit rougher than I like. You will still have a beautiful lamp either way, but if your driftwood is on the clean side, you may want to forgo this process.
Total time: 4-5 hours, including drying time
Total cost: $15-$35, depending on your existing lamp situation
Materials:
5-6 pieces of driftwood, roughly equal in length
Lamp base
Fine-grit sandpaper (150+)
Fast-drying polyurethane or shellac
Epoxy glue for wood and metal (or any clear-drying, heavy-duty adhesive for wood)
Rubber bands, string, and/or tape
Lamp shade

Step 1: Find a lamp base
This doesn’t have to be anything fancy. If you already have a lamp that you don’t use anymore or would like to make over, then that’s great. If not, you can find a cheap lamp at yard sales or in the clearance section of most department stores. I found my HEMMA lamp base at IKEA for $8. If you go this route, do be aware of the size of the socket opening. IKEA lamps have bigger sockets than standard American lamps so, if you get yours from IKEA, then make sure the lamp shade you choose will fit over the socket. I found this out the hard way by purchasing a really cute lamp shade in Target’s clearance section and finding out it didn’t fit the lamp base I bought. I ended up returning that lamp shade (bummer) and purchasing a JÄRA lamp shade from IKEA for $12.
Step 2: Polyurethane your driftwood

This step isn’t absolutely necessary but polyurethane (or shellac) will make the driftwood really come to life and give it a rich look. First, lightly sand each piece of driftwood with a fine-grit sandpaper (I used 150). Make sure to brush off any excess dust and dirt, then apply a thin coat of polyurethane to each piece. Allow the driftwood to dry according to the directions on the polyurethane can (usually 3-4 hours). If necessary, apply another thin coat of polyurethane and let dry for another few hours.
Step 3: Arrange the driftwood around the lamp base

Start placing the driftwood pieces around the base in any form or fashion looks good to you. Experiment with different looks and placements. When you have a rough idea of where you want each piece to go, place a rubber band (or string or masking/painter’s tape) around the structure to hold it in place. Use multiple rubber bands if you need to.
Step 4: Glue the heck out of your driftwood

Mix together the epoxy glue, a little at a time, according to the directions on the package. Mine came with a small stir stick and mixing tray, making it easy to mix small amounts at a time. Find the places where two driftwood pieces touch each other and, quickly but carefully, start applying the glue in between those cracks. Hold the pieces together for a minute or two while the glue sets.
Repeat until all of the pieces are attached to one another and you have one solid piece. Let the driftwood dry for at least an hour or more. For added stability, I tied shoelaces around the driftwood to make sure it would stay in place while drying.
Step 5: Add a lamp shade
Once the glue has dried, remove the rubber bands. Add the finishing touches by attaching a lamp shade and a light bulb.
*This post originally appeared on my former blog, Kept. While that blog has since retired, all the content transferred is up-to-date and my own.